
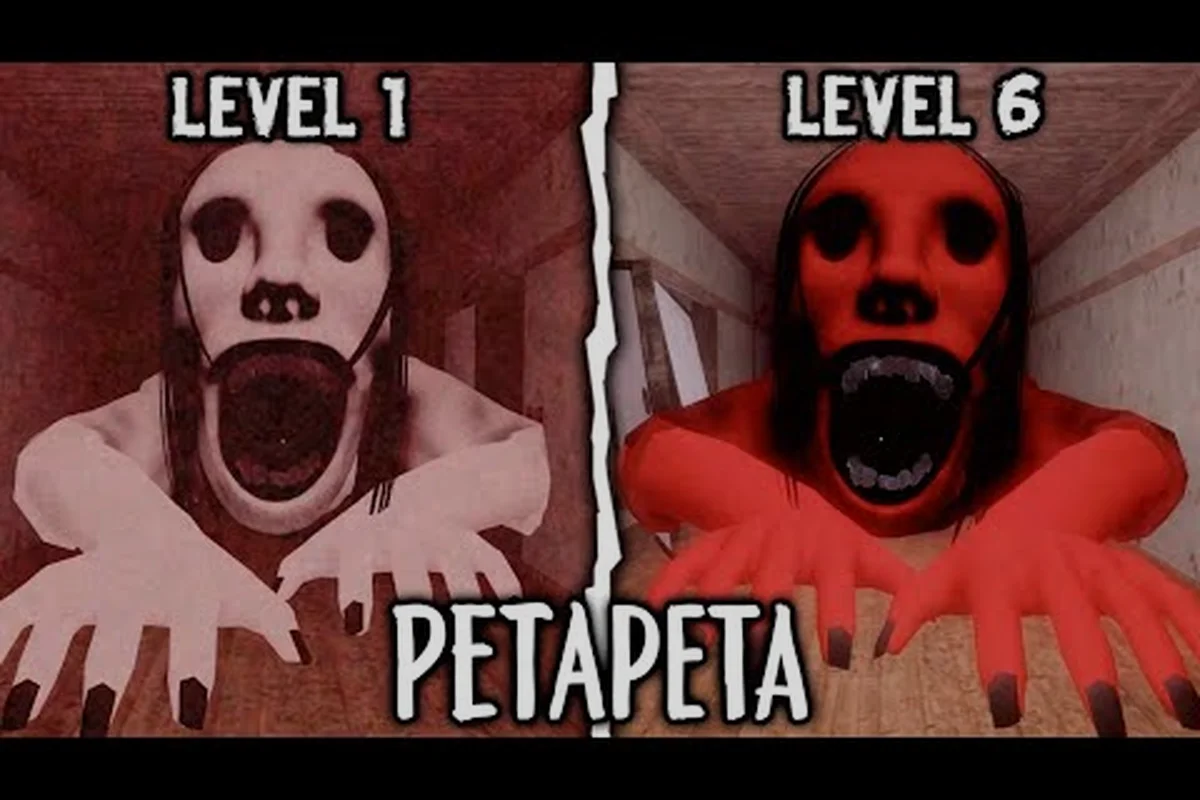
The core PETAPETA game mechanics come down to three interlocking rules: never touch the monster, answer puzzles correctly to escape, and manage the anger meter that every right answer pushes higher. Understanding how those systems feed each other is the difference between a clean escape and a failed run, and this breakdown shows exactly how the loop works.
What the PETAPETA game mechanics actually reward
Most horror puzzle games punish you for being slow. This one punishes you for being right too often, which flips the usual instinct on its head. Every correct answer raises the creature's anger, so a player who solves everything instantly can end up in more danger than someone who stalls. That tension is the heart of any PETAPETA complete guide worth reading.
The system has three visible layers, and they all run at the same time: the touch rule, the anger meter, and the explore-puzzle-escape loop. They interlock rather than stack — the touch rule sets the fail state, the anger meter decides how fast that fail state approaches, and the loop determines how many chances you get to reset the pressure. Reading them together explains why a fast solve on a late-room puzzle is riskier than a slow solve on an early one, since the anger meter carries over between rooms while the loop only resets your position.
-
The touch rule — physical contact with the monster ends the run immediately, with no grace period and no second chance.
-
The anger meter — a hidden-to-visible escalation counter that climbs each time you solve a puzzle correctly.
-
The explore-puzzle-escape loop — the repeating structure of finding a room, solving its puzzle, and relocating before the monster closes in.
Community reports describe the anger system as the single most misunderstood element, because new players assume speed is always safety. In practice, the meter turns a fast solver into a target. If you want a broader baseline on staying alive between puzzles, the survival guide covers movement and hiding fundamentals that pair directly with these rules.
Why the touch rule is absolute
There is no health bar, no damage state, and no recovery animation. Contact equals failure. That design choice means every mechanic in the game is built around distance management rather than combat, and it explains why so much of the skill ceiling lives in positioning rather than reflexes.
Because the rule is binary, the monster does not need to be fast to be threatening. It only needs to appear where you did not expect it. Players who internalize this stop treating the creature as an enemy to outrun and start treating it as a moving boundary of the map.
How monster anger scales with correct answers
The anger meter is the mechanic that separates experienced players from everyone else. Each correct puzzle solution adds to it, and the monster's behavior changes as the value climbs. Based on community testing, the escalation follows a rough three-stage pattern, though exact thresholds may shift with patches.
| Anger stage | Trigger | Monster behavior | Player counter |
|---|---|---|---|
| Calm | 0-2 correct answers | Slow patrols, long pauses between moves | Explore freely, map the room |
| Alert | 3-5 correct answers | Faster pathing, checks nearby rooms | Move after every solve |
| Enraged | 6+ correct answers | Aggressive pursuit, short idle windows | Pre-plan exit routes, avoid backtracking |
The practical takeaway is that your third and fourth correct answers are the danger spike. That is when the creature stops wandering and starts hunting. A player who solves two puzzles and then repositions has a far better survival rate than one who chains four solves in the same room.
Reading the anger cues
The game does not show you a number. Instead, it communicates anger through audio and animation: heavier footsteps, a change in the monster's idle loop, and a shift in how quickly it turns toward sound. Reported by players, the audio cue is the most reliable signal, so playing with headphones is close to mandatory for consistent reads.
If you hear the footsteps tighten into a rhythm, treat that as confirmation the meter has moved up a stage. At that point, stop solving and start moving. The anger does not decay quickly, so waiting it out in a corner rarely works.
The explore-puzzle-escape loop, step by step
Every room in the game runs the same three-beat structure, and understanding the order of operations is what makes a PETAPETA full game guide useful rather than just descriptive. The loop is not optional; it is the entire game.
| Phase | What you do | What the monster does | Common mistake |
|---|---|---|---|
| Explore | Scan the room, locate the puzzle trigger, note exits | Patrols on a fixed route | Rushing the trigger before checking exits |
| Puzzle | Solve the sequence or interaction | Continues patrol, may drift closer | Solving without a planned escape line |
| Escape | Leave the room before anger escalates | Reacts to the solve, moves toward you | Lingering to search for extra items |
The mistake column is where most runs die. Players treat exploration as free time and puzzles as the risky part, when in reality the escape phase is the most dangerous window because the monster is actively responding to your solve.
Sequencing solves across rooms
The strongest strategy is to bank easy puzzles and delay hard ones. If a room has a simple solution, solve it early while anger is low, then use the higher-anger window to explore rooms that need no solving. This lets you gather information during the dangerous phase instead of triggering it.
The puzzle guide breaks down individual sequence types if you are stuck on a specific room, but the sequencing principle above applies everywhere: your solve order matters as much as your solve speed. Concretely, a room with three chained sequence locks solved in the wrong order can force you to re-trigger the anger phase you just spent a low-anger window avoiding, whereas solving the same three locks in ascending difficulty keeps each step inside a manageable anger band. Treat the puzzle guide as a lookup for lock-type mechanics, not a substitute for planning your route — check a room's sequence type before entering so you can slot it into the correct position in your solve order rather than improvising under pressure.
Practical rules for winning runs
Winning in this game is less about reaction time and more about discipline. The anger meter is the real opponent: every puzzle you solve in a room nudges it higher, and once it crosses into the aggressive threshold the monster's patrol speed and search radius both expand, shrinking the window you have to reach an exit. Because the spike compounds rather than resets, a run built on chaining quick solves tends to collapse in the mid-game even when individual answers are correct. The following rules come from repeated community observation and hold up across most runs.
-
Never solve two puzzles in the same room. The anger spike compounds and you lose your escape window.
-
Walk, do not sprint, during the calm phase. Sprinting generates noise cues the monster reacts to.
-
Always identify two exits before touching a trigger. One exit is a trap if the monster blocks it.
-
Treat the third correct answer as a countdown. After it, assume the creature knows roughly where you are.
-
Reset your mental map after every escape. Rooms shift in perceived danger as anger rises, so old routes stop being safe.
If you are chasing a fast clear rather than a safe one, the speedrun and completion route shows how top players compress the loop, and it is worth noting that their routes deliberately avoid chaining solves.
Exceptions to the Touch Rule
There are moments where the disciplined approach costs you the run. If the monster is already enraged and patrolling your only exit, solving one more puzzle can pull it toward the puzzle trigger and open a path behind it. That is a calculated risk, not a default strategy, and it only works when you have a confirmed second route.
Anger management versus puzzle speed
The central strategic question in any PETAPETA how to win discussion is whether to prioritize speed or control, and the answer depends on how the anger meter escalates across calm, alert, and enraged stages. Speed solving clears rooms before anger stacks, but each rushed mistake feeds the meter and can trigger the enraged state early. Controlled pacing keeps the monster in calm or alert longer, yet every extra second of exposure adds risk in unfamiliar rooms. The two goals pull against each other, and the table below shows how they compare in practice.
| Approach | Strength | Weakness | Best for |
|---|---|---|---|
| Speed solving | Clears rooms before anger stacks | Triggers enraged state early | Experienced players with memorized routes |
| Controlled pacing | Keeps monster in calm or alert stage | Slower progress, more exposure time | First runs and unfamiliar rooms |
| Hybrid | Solves easy rooms fast, stalls on hard ones | Requires good route knowledge | Most players after two or three attempts |
The hybrid approach wins most often because it exploits the asymmetry in the anger system: the calm-to-alert-to-enraged escalation means every solve you bank early is anger budget you never spend, while every hard puzzle you stall on is a decision to pay the meter down later at a worse exchange rate. Easy puzzles are cheap to solve and give you information — you learn the room layout and the monster's patrol timing while the meter is still in the calm stage, so a mistake costs a sliver of anger rather than pushing you toward enraged. Hard puzzles are expensive because they consume anger budget you may need later, and a failed attempt in the enraged stage can cascade into a second failure before the meter resets. In practice, a hybrid run might speed-solve the first two rooms to keep the monster in calm, then deliberately slow down on a memorized hard room only after confirming the patrol route, converting information gathered cheaply into a controlled, single-attempt solve.
The anger budget concept
Think of each run as having a fixed number of correct answers before the monster becomes unmanageable. Spending that budget on rooms you already understand is waste. Spending it on rooms that unlock new areas is investment. Players who frame the meter this way stop panicking at the third solve and start planning around it.
How the mechanics fit together
The three systems are not separate features; they are one feedback loop. The touch rule makes distance the only resource that matters, the anger meter makes correct answers a cost, and the explore-puzzle-escape loop is the structure that converts both into moment-to-moment decisions.
Once you see the loop this way, the game stops feeling unfair. A monster that appears suddenly is not random; it is responding to an anger value you raised. A room that feels impossible is usually a room you solved too early. For a full walkthrough of the hotel setting and its ending, the HorrorJackStar full game walkthrough shows the loop in motion across a complete run.
The final habit worth building is a post-run review. After each attempt, ask which solve pushed the anger into the next stage and whether that solve was necessary. That single question improves survival faster than any reflex training, because it targets the mechanic that actually decides outcomes.
Frequently Asked Questions
What happens if the monster touches you in PETAPETA?
Contact ends the run instantly. There is no health system, no damage state, and no recovery window, so the touch rule functions as an absolute fail condition rather than a combat mechanic. This is why positioning and exit planning matter far more than speed or reaction time.
Does monster anger go down over time?
It does not decay quickly enough to rely on. Based on community testing, the meter holds its stage for a long stretch, so waiting in a corner rarely resets the creature to calm. The practical approach is to plan around the anger level rather than try to outlast it.
How many puzzles can I solve before the monster gets aggressive?
Community reports place the shift at roughly three to five correct answers, with the third solve being the clearest danger spike. Exact thresholds may vary by version, so treat the third solve as your signal to reposition rather than pushing for a fourth.
Is it better to solve puzzles fast or slow?
Neither extreme wins consistently. Fast solving stacks anger early and triggers pursuit, while slow solving leaves you exposed in rooms for longer. The hybrid approach, solving easy rooms quickly and stalling on hard ones, produces the most reliable results across most runs.