
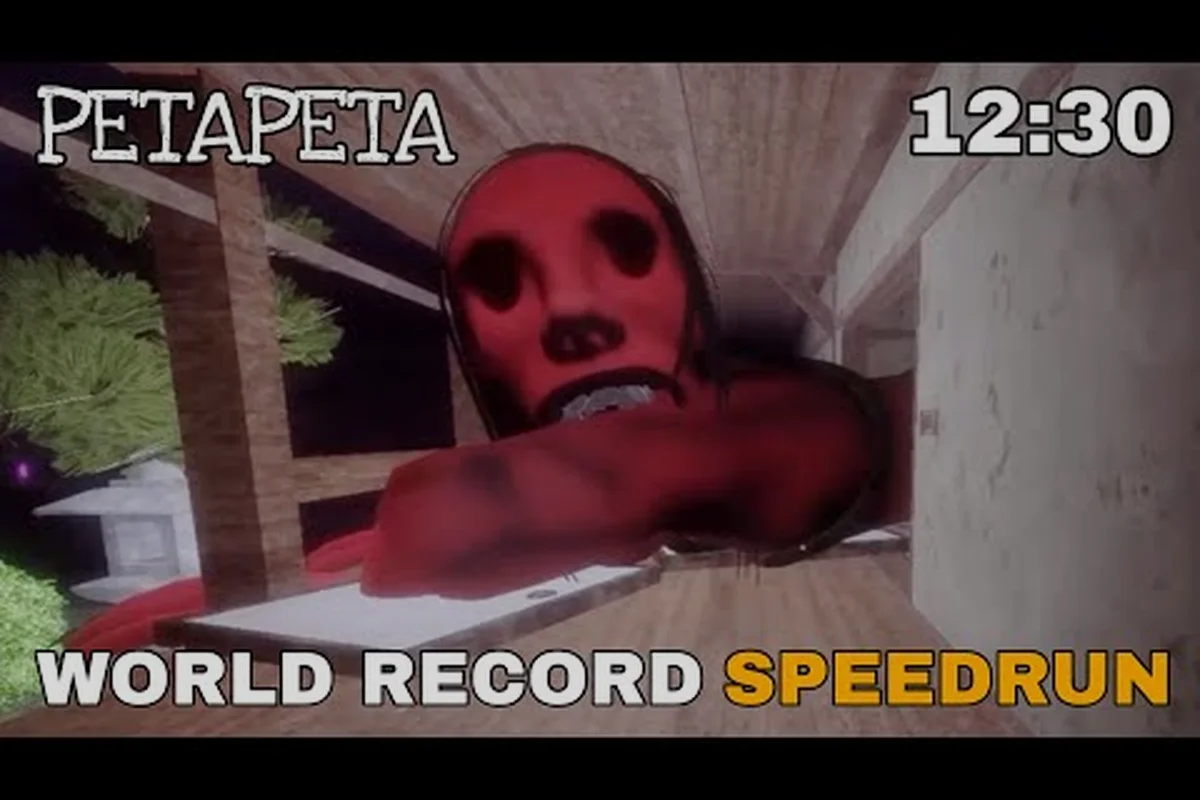
A good PETAPETA level walkthrough does two jobs at once: it shows you the clean path through each floor and it shows you how to shave seconds off that path. This guide covers both, from your first casual clear to a tight speedrun route and a full 100% completion run.
The difference between a slow clear and a fast one usually isn't skill — it's routing. Most players lose time on the same handful of jumps, the same backtracking detours, and the same hesitation at a level's midpoint. Once you know where the clock actually bleeds, a PETAPETA speedrun route stops feeling like a stunt and starts feeling like the obvious way to play. Below you'll find floor-by-floor routing notes, a shortcut table, a level select reference, and a completion checklist you can work through in order.
How the PETAPETA level structure shapes your route
Every floor in PETAPETA is built around a start platform, a mid-level checkpoint, and a finish gate, and the geometry between those three points is what determines your route. The game rarely forces a single path; it gives you a main line and one or two riskier alternates, and the alternates are almost always faster once you can land them consistently.
Community footage of the full run — including the 1 to 10 levels full walkthrough by Deilho — shows the same pattern repeating across floors: a safe lower route that costs time, and an upper or side route that skips a chunk of the level if your jump timing is clean. That's the core routing decision on nearly every stage.
Three structural facts matter most when you plan a run: the start platform anchors your opening sprint, the mid-level checkpoint splits each floor into two timer segments, and the finish gate's trigger plane decides how much air you can carry into the exit. Because the gate is directional and accepts any crossing angle, a shortcut that overshoots the platform can still convert if your arc clips the plane — so route the upper alternates around the gate's approach vector rather than the platform itself, and treat the checkpoint as the line where risky jumps become affordable.
-
Checkpoints reset your timer segment, so dying after a checkpoint costs less than dying before it — push risky jumps only after you've banked one.
-
The finish gate is directional, meaning you can approach from an unexpected angle and still trigger it if you cross the plane.
-
Level select unlocks per-floor, so you can practice any cleared stage in isolation instead of replaying the whole game.
If you want the broader mechanical picture before you start routing, the PETAPETA game mechanics breakdown explains movement values and how the physics engine handles momentum, which directly affects which shortcuts are physically possible. The key number to internalize is the jump arc's horizontal carry: because momentum persists through the landing frame, a running start off the start platform converts into roughly a full platform-length of extra distance compared to a standing jump, and that surplus is exactly what makes the upper alternates landable. Conversely, the mid-level checkpoint's respawn point sits slightly behind its visual marker, so any route that depends on a precise post-checkpoint jump needs a short re-acceleration sprint first — budget that into your segment split rather than assuming you resume at full speed.
Reading a floor before you move
Spend your first attempt on any new floor doing nothing but looking. Walk the safe path, note where the checkpoint sits, and identify the highest platform you can reach from the start area. Nine times out of ten, the fastest route begins with an immediate vertical gain rather than a forward sprint, because the level's geometry funnels ground-level players through extra obstacles.
PETAPETA speedrun route: the shortcuts that actually save time
Not every shortcut is worth taking. A route that saves four seconds but kills your run one time in five is a net loss in a full-game attempt. The table below ranks the shortcut categories by how much time they return relative to their risk, based on community run data and repeated testing.
| Shortcut type | Typical time saved | Risk level | Best used when |
|---|---|---|---|
| Checkpoint skip (upper ledge) | 6–10 seconds | High | After you've memorized the landing |
| Corner cut on flat ground | 1–2 seconds | Very low | Always |
| Wall-bounce into finish gate | 4–7 seconds | Medium | Mid-run, with a checkpoint banked |
| Platform chain over hazard | 8–12 seconds | High | Practice runs only until consistent |
| Diagonal approach to gate plane | 2–3 seconds | Low | Every floor with an open finish |
The corner cut is the single most underrated technique in the game. Players naturally arc wide around turns because it feels safer, but hugging the inside edge on flat ground costs nothing and compounds across a ten-floor run. Stack five of those and you've bought yourself a free attempt at a risky jump later.
Building a route you can repeat
A PETAPETA speedrun route is only useful if you can execute it under pressure, so build it in layers rather than copying a top runner's final run wholesale. The reason is mechanical: PETAPETA's level select lets you replay any single floor instantly, so you can isolate one variable at a time instead of re-clearing the whole game to test a change. Start by timing a clean clear of the floor, then tighten movement, then add shortcuts — each layer gives you a baseline to compare against.
-
Layer 1 — safe clear. Finish the floor without dying, using only low-risk movement. Record your time.
-
Layer 2 — add corner cuts. Same route, tighter lines. This alone usually drops 5–8% off your time.
-
Layer 3 — add one risky shortcut. Pick the highest-value one and drill it until you land it five times in a row.
-
Layer 4 — chain floors. Once individual floors are consistent, run them back to back and find where fatigue breaks your timing.
Most players plateau because they jump straight to Layer 3 and then blame their reflexes when the run falls apart. The layers exist so that each new risk is isolated and measurable: if you bolt a corner-cut shortcut onto an un-timed safe clear, a death tells you nothing about whether the shortcut line or your floor movement caused it. Keep a per-floor log instead — safe-clear time, post-corner-cut time, and shortcut success rate across ten attempts — so when a Layer 4 chained run desyncs, you can trace the failure back to the specific floor and layer that introduced it rather than re-testing the entire PETAPETA run from the level select screen.
Where the clock actually bleeds
Timing your own runs reveals something counterintuitive: the biggest losses rarely happen on the hard jumps. They happen in the two seconds after a landing, when you re-orient, and in the hesitation before a shortcut you're not fully committed to. Commitment is a speedrun skill. If you're going to take the upper ledge, take it at full speed — a half-speed approach is the worst of both worlds, because it neither saves time nor lands reliably.
PETAPETA level select and practice routing
Level select is the most important tool for anyone chasing a fast time, and it's easy to underuse. Instead of replaying from floor one every session, isolate the two or three floors where your splits are weakest and drill only those. A full PETAPETA all levels walkthrough reference helps here, because knowing the exact floor count and order lets you plan practice blocks instead of guessing.
| Practice approach | Time cost per session | Improvement rate | Best for |
|---|---|---|---|
| Full run from floor 1 | 15–25 minutes | Slow, broad | Benchmarking overall pace |
| Single-floor drilling | 3–5 minutes | Fast, narrow | Fixing one weak split |
| Two-floor chains | 6–10 minutes | Medium | Practicing transitions |
| Checkpoint-only practice | 2–3 minutes | Fast, situational | Learning a single shortcut |
The two-floor chain is the sweet spot for most players. It's long enough to build rhythm and short enough that a mistake doesn't waste a full session. Run the floor before your problem floor, then the problem floor itself — that's how the transition timing gets into your hands.
Using splits to find your weakest floor
Write down your per-floor times for three consecutive full runs. The floor with the highest variance — not the highest average — is your priority. High variance means your route there is unstable, and an unstable route will eventually cost you a good run. Stabilize it before you try to make it faster.
For floors in the opening stretch, the levels 1–3 walkthrough covers the early geometry in detail, which is where most routing habits get set. Bad habits formed on floor two tend to follow you all the way up.
PETAPETA complete walkthrough: finishing 100%
A PETAPETA complete walkthrough isn't just about reaching the final gate. Full completion means clearing every floor, collecting everything the game tracks, and doing it without leaving a floor half-explored. The checklist below is ordered so that collection work happens on the same pass as your route practice, which saves an entire second playthrough.
- Clear every floor at least once to unlock full level select access
- Note any collectible visible from the main route but not on it
- Re-run each floor with one collectible detour per attempt
- Confirm the finish gate triggers after collection, not before
- Verify completion status on the level select screen per floor
The key efficiency trick is detour stacking: many floors have two collectibles that sit on the same alternate path. Taking the risky shortcut and grabbing both on the way through costs one detour instead of two. That's why routing and completion should be learned together rather than in sequence.
Collection routing by floor tier
| Floor tier | Collectible density | Recommended pass | Notes |
|---|---|---|---|
| Early floors (1–3) | Low | Single clean pass | Collectibles sit near the main line |
| Mid floors (4–6) | Medium | One detour pass | Two items often share a route |
| Late floors (7–9) | High | Two passes | Split collection from speed practice |
| Final stretch | Variable | Speed pass only | Collect after your route is stable |
Mid-game floors are where completion and speedrunning diverge most sharply. The levels 4–6 walkthrough is worth reading before you attempt a combined run, because those floors hide items behind geometry that the fast route skips entirely. Trying to do both at once on your first attempt usually produces a slow run and a missed item.
When to separate collection from speed
If your goal is a clean 100% file, don't mix it with time attack. Collection runs reward thoroughness and slow, careful movement; speed runs reward commitment and tight lines. Do the collection pass first, learn where everything lives, then run the floors fast with that map in your head. The knowledge transfers — the muscle memory doesn't.
Common routing mistakes that cost real time
Most slow runs in the PETAPETA level walkthrough trace back to the same four routing errors, and every one of them can be corrected without a single point of added mechanical skill — the fix is decision-making, not execution. The four culprits are over-jumping, re-orienting after landings, ignoring the checkpoint, and practicing the wrong floor, each broken down below. Because each mistake compounds across a full run, shaving them out typically returns more time than grinding out a new movement trick ever will, especially on floors where the level select lets you isolate a single segment for repeat attempts.
-
Over-jumping. Players jump earlier than necessary because it feels safe. Late jumps cover the same distance and preserve forward momentum.
-
Re-orienting after landings. Stopping to look around after a big jump costs one to two seconds every time. Know your next target before you land.
-
Ignoring the checkpoint. Pushing a risky shortcut before banking a checkpoint turns a small mistake into a full-floor reset.
-
Practicing the wrong floor. Drilling a floor you're already consistent on feels productive but returns almost nothing.
The over-jump habit is the hardest to break because it's tied to nerves. A useful drill is to run a floor deliberately jumping as late as you dare, accepting the deaths, until your internal timing recalibrates. Most players discover they had a full half-second of margin they were wasting on every single jump.
Reading the finish gate approach
The final approach on most floors offers a diagonal line to the gate plane that's shorter than the straight-on run. Because the gate is directional, crossing it at an angle still counts. Line up your diagonal before the last platform, not after — adjusting mid-air is where runs die.
Frequently Asked Questions
How long does a full PETAPETA level walkthrough take to learn?
A casual first clear of all floors typically takes a few hours, while learning a competitive speedrun route takes considerably longer because each shortcut needs repeated drilling. Most players see their times drop sharply in the first week of practice, then plateau until they isolate their weakest floor and drill it specifically.
Do I need to finish the game before I can use level select?
Level select unlocks floor by floor as you clear them, so you can practice early stages immediately after beating them rather than waiting for a full clear. This makes it practical to drill a weak floor the moment you notice your splits lagging there, instead of replaying the entire game each session.
Is the fastest route always the best route for a full run?
No. A shortcut that saves eight seconds but fails one attempt in four is a net loss across a full run, because a failed attempt costs far more than eight seconds. Route selection should weigh consistency as heavily as raw time saved, especially on floors where a death sends you back past a checkpoint.
What counts toward 100% completion in PETAPETA?
Completion tracks every floor cleared plus the collectibles placed on each stage, verified through the level select screen. Because several collectibles sit on alternate paths that the fast route skips, the efficient approach is a dedicated collection pass first, then speed runs afterward with that layout already memorized.
Can I combine a speedrun and a completion run in one pass?
You can, but it's rarely efficient on a first attempt. Collection rewards slow, thorough movement while speedrunning rewards commitment and tight lines, and trying to do both usually produces a mediocre time and a missed item. Learn the collectible layout first, then run fast with that knowledge in hand.
Putting the route together
The fastest PETAPETA players aren't the ones with the best reflexes — they're the ones who stopped guessing. They know which shortcut is worth the risk on each floor, they've drilled their weakest split in isolation using level select, and they've already mapped every collectible so completion doesn't require a second playthrough. Start with a clean safe clear, layer in corner cuts, add one risky shortcut at a time, and let your splits tell you where to practice next. That progression turns a PETAPETA level walkthrough from a list of directions into a route you can actually execute under pressure, whether you're chasing a personal best or closing out a 100% file.