
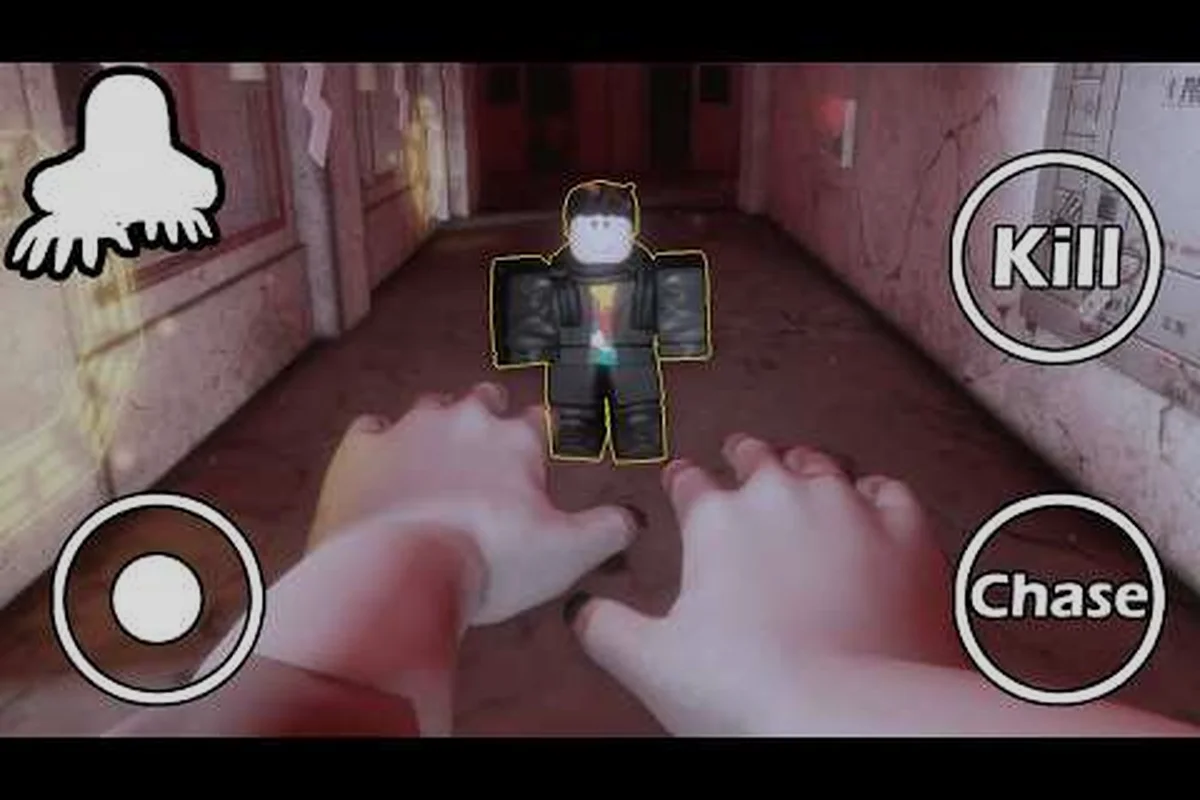
A complete PETAPETA monster guide matters because the creatures are the whole game: each one telegraphs a different attack, and misreading a single tell ends a run. This breakdown covers every monster in the PETAPETA monster list, what each one does, and exactly how many monsters in PETAPETA you should expect to face as you push deeper.
How many monsters in PETAPETA and how the roster is built
The short answer is that the game runs on a small, repeating cast rather than a huge bestiary. According to community reports and player experience across the level progression, you encounter a core set of creature types that get remixed, sped up, and combined as you climb. That design choice is deliberate: instead of memorizing dozens of one-off enemies, you learn a handful of tells extremely well and then survive harder versions of them.
What makes the roster feel bigger than it is comes down to three layers of variation: the base creature types you meet first, the Mini Peta offshoots that split off from them, and the escalation versions that recycle the same silhouettes with tighter timing. Each layer multiplies the effective threat count without adding a new model, so a monster you learned in an early level can reappear two or three times in harder forms — which is why the table below tracks difficulty impact per layer rather than raw monster totals.
-
Base creature types — the distinct silhouettes you first meet in the early levels, each with its own movement pattern and sound cue.
-
Mini Peta variants — smaller, faster offshoots of the main creatures that behave differently in tight spaces.
-
Escalation layers — later stages reuse the same monsters with tighter timing windows and shorter warning animations.
Because of that structure, a PETAPETA monster list is less about counting unique models and more about mapping which tell belongs to which threat. Players who track the tells rather than the names tend to survive longer, since the game rarely surprises you with a brand-new animation late in a run — it surprises you with an old one that arrives half a second sooner.
The table below summarizes how the roster is organized so you can plan your attention before you ever load into a level, sorting each of the three layers by what it adds, where it shows up in the level progression, and how sharply it raises difficulty. Read it as a threat-budget rather than a headcount: a base creature ranks low to moderate, its Mini Peta offshoot jumps to moderate or high, an escalation version lands high, and a combined encounter — two or more threats sharing the same arena — sits at very high. That last row is the one to internalize, because most late-run deaths come from overlapping tells, not from any single PETAPETA monster acting alone.
| Roster layer | What it adds | Where it shows up | Difficulty impact |
|---|---|---|---|
| Base creatures | Core silhouettes and sound cues | Early to mid levels | Low to moderate |
| Mini Peta variants | Faster, smaller offshoots | Mid levels onward | Moderate to high |
| Escalation versions | Same monsters, tighter timing | Late levels | High |
| Combined encounters | Two or more threats at once | Late stages and modes | Very high |
Understanding this three-layer model is the single most useful thing you can do before reading individual entries, because it tells you that mastering a monster early pays off twice — once now, and again when it returns faster. Concretely, a base creature whose sound cue you learn in an early level is the same tell that, as a Mini Peta offshoot, splits toward you in a tight corridor, and later returns as an escalation version with a shorter warning animation. Learning one tell therefore covers three rows of the table at once, which is why the roster's effective threat count outpaces its model count.
PETAPETA all monsters explained: the core creature types
Every entry in this section follows the same logic: what the creature looks like, how it moves, and the tell that signals it is about to strike. Treat the visual description as your first filter and the tell as your survival cue. If you can name the tell before the animation finishes, you are already ahead of most first-time players.
The core creatures share a design philosophy — they are readable at a glance but punish hesitation. That means the correct response is almost always a decisive move rather than a slow, cautious one. Community testing consistently shows that players who commit to a dodge or a reposition early take fewer hits than players who wait to confirm the threat.
| Creature type | Silhouette cue | Movement style | Strike tell | Best response |
|---|---|---|---|---|
| Stalker-type | Tall, thin, low to the ground | Creeps along walls | Freezes briefly before lunging | Sidestep, then move away from the wall |
| Charger-type | Bulky, forward-leaning | Straight-line rushes | Audible wind-up sound | Break line of sight or dodge perpendicular |
| Lurker-type | Small, rounded, hard to spot | Hides in clutter | Faint rustle before emerging | Keep distance from piles and corners |
| Swarm-type | Multiple small shapes | Spreads out to flank | Sudden clustering | Retreat to a narrow space |
Each of these four families behaves consistently enough that you can build a mental shortcut: wall-huggers lunge, bulk rushers charge, small shapes hide, and groups flank. Once those four rules are automatic, the escalation versions become manageable because the underlying logic never changes — only the speed does.
Spotting the Freeze Before an Attack
The most important universal tell across the roster is the brief freeze. Almost every creature in the game pauses for a fraction of a second before committing to an attack, and that pause is your entire reaction window. Learning to watch for stillness rather than motion is counterintuitive at first, because your instinct is to track movement. Train yourself to notice when something stops, and your survival rate climbs noticeably within a few runs.
Why sound matters as much as sight
Several creatures announce themselves with audio before they are visible, especially in darker areas where the visual tell is hard to catch. Players who play with headphones report catching wind-up sounds earlier than players relying on visuals alone. If you are struggling with a specific encounter, the fix is often audio rather than reflexes.
The PETAPETA monster list by progression stage
Knowing the creatures is only half the job — you also need to know when each one enters the rotation. The roster expands gradually, and the game uses early levels to teach tells that later levels assume you already know. Skipping that learning phase is the most common reason players hit a wall mid-run.
The progression table below maps creature families to the stage ranges where they typically first appear, based on community-reported playthroughs. Treat it as a diagnostic tool rather than a strict schedule: if a Stalker-type freeze tell still catches you off guard during the early-mid Charger-type stages, that gap signals a missed foundation, not a difficulty spike. Exact placement can shift slightly between versions, so use the ranges to anticipate which tell each new PETAPETA monster will test, and cross-check against your own death log before assuming a stage is unfairly tuned.
| Stage range | New threats introduced | What you should practice | Common mistake |
|---|---|---|---|
| Opening stages | Stalker-type | Watching for the freeze | Backing into walls |
| Early-mid stages | Charger-type | Perpendicular dodging | Trying to outrun a charge |
| Mid stages | Lurker-type | Scanning clutter and corners | Ignoring small shapes |
| Mid-late stages | Swarm-type | Using narrow spaces | Fighting in open rooms |
| Late stages | Escalation versions | Faster reaction windows | Relying on old timing |
If you want the full picture of how these stages are ordered and how long each one runs, the level list and progression breakdown lays out the sequence stage by stage. Pairing that with this monster guide gives you both the map and the threats on it.
The key insight from this table is that each stage range introduces exactly one new problem while reinforcing the previous ones. That is why players who rush through the early stages without internalizing the freeze tell tend to collapse the moment escalation versions arrive — they never built the foundation the later game assumes.
PETAPETA monsters explained: Mini Peta variants and harder encounters
Once the base roster is familiar, the game introduces smaller offshoots that behave differently enough to break your habits. These variants are the reason a monster guide needs more than a single pass — the same creature you learned in stage two returns as a faster, twitchier version that punishes the exact response you trained.
Mini Peta variants differ from their parents in three consistent ways: they are smaller, faster, and more often paired. In practice, that combination compresses the entire PETAPETA monster encounter loop — the base creature's comfortable pause before a lunge shrinks to a very short window, so the freeze tell you learned to read on the standard version arrives almost without warning. Because the smaller silhouette also hides behind clutter, scanning low and behind objects matters more than watching center screen, and a paired spawn means committing to one dodge instead of two.
-
They are smaller, which makes them harder to track in cluttered rooms and easier to lose behind objects.
-
They move faster, shortening your reaction window and making the freeze tell harder to catch.
-
They often appear in pairs, forcing you to split attention instead of committing to a single dodge.
The Mini Peta variant guide goes deeper into each offshoot, including which ones appear together and how their timing differs from the base creatures. For this overview, the practical takeaway is simple: when you see a smaller silhouette, assume the timing is roughly half of what you expect and react immediately rather than confirming.
| Variant behavior | Base version | Mini Peta version | Adjustment needed |
|---|---|---|---|
| Reaction window | Comfortable pause | Very short pause | React on first cue |
| Visibility | Clear silhouette | Small, easily hidden | Scan low and behind objects |
| Group size | Usually solo | Often paired | Keep an escape route open |
| Punish window | Generous | Tight | Commit to one dodge, not two |
Handling paired encounters
When two variants close in at once, the instinct is to dodge both — which usually means dodging neither well. The better approach is to identify which one is closer to its strike and deal with that threat first while moving away from the second. Distance is your ally here, because paired variants rarely coordinate perfectly, and creating space often resets one of them.
When escalation changes the rules
Late-game escalation versions keep the same silhouette but compress the timing so aggressively that old habits become liabilities. A dodge that worked in stage three can arrive too late in stage eight. The fix is not to learn new moves but to shorten your decision time — decide the moment you see stillness, not after you confirm it.
Recognizing the scariest monster encounters before they land
The encounters players remember are rarely the hardest ones mechanically — they are the ones that catch you off guard. Jump scares and sudden appearances are a core part of how this game builds tension, and understanding their structure removes most of the shock value while keeping the challenge intact.
Community reports describe a consistent pattern: the scariest moments are scripted to fire when you are focused on something else, usually a puzzle or a doorway. That means the counter is attention management rather than faster reflexes. If you are entering a new room, expect a cue within the first few seconds and keep your hands ready rather than relaxing after a safe-looking transition.
A full catalog of these moments, including which rooms trigger them and how to brace for each one, lives in the jumpscare and death scene breakdown. Reading it before a run converts several guaranteed scares into expected ones, which is often the difference between a clean run and a panicked mistake.
| Encounter type | Typical trigger | Warning available | Best preparation |
|---|---|---|---|
| Doorway scare | Entering a new room | Faint audio cue | Pause before stepping through |
| Puzzle ambush | Focusing on an object | Brief visual flicker | Keep peripheral vision active |
| Corridor chase | Passing a narrow section | Distant sound | Know your retreat path |
| Sudden appearance | Idle moments | Almost none | Stay in motion |
The pattern across all four encounter types is the same: stillness on your part is what invites the scare. The Sudden appearance row in the table above gives it the starkest numbers — "almost none" warning and idle moments as the trigger — so a player who stands still to read a note or check a corner is effectively holding the door open for it. Staying in motion, even a slight strafe or a small camera sweep, keeps your hands on the controls and denies the game the idle state it scans for before firing the cue. Treat the faint audio cue at a doorway and the brief visual flicker during a puzzle ambush as your two reliable early signals, and keep moving through both rather than freezing to listen.
Practical survival tips for every PETAPETA monster
Mechanics knowledge only converts into survival if you build habits around it, because the PETAPETA monster roster punishes reaction speed and rewards pattern recognition. Each tip below maps directly to a specific failure mode rather than offering generic advice: the habits table pairs perpendicular dodging with escaping charge lines, wall avoidance with preserving escape angles against wall-hugging creatures, and one-tell-per-stage learning with preventing panic overload. Treat the table as a diagnostic checklist — when a run ends badly, identify which habit lapsed before blaming the monster's damage output.
-
Never fight with your back to a wall. Wall-hugging creatures use the wall to close your escape angle, and the resulting corner trap is the most common cause of avoidable deaths.
-
Dodge perpendicular, not backward. Backing away keeps you in the charge path; stepping sideways removes you from it entirely.
-
Learn one tell at a time. Trying to memorize the whole roster in a single run overloads you. Pick one creature per stage and master its cue before moving on.
-
Use narrow spaces against swarms. Groups that flank you in open rooms lose their advantage in corridors where they cannot spread out.
-
Play with audio. Several wind-up cues are audible before they are visible, and headphones convert those into extra reaction time.
-
Reset rather than scramble. When an encounter goes wrong, creating distance is almost always better than trying to salvage it in place.
| Habit | Failure it prevents | Why it works |
|---|---|---|
| Perpendicular dodging | Getting caught in a charge | Removes you from the attack line |
| Avoiding walls | Corner traps | Preserves escape angles |
| One tell per stage | Overload and panic | Builds durable recall |
| Audio-first awareness | Missed wind-ups | Earlier warning than visuals |
Building a personal threat checklist
Experienced players tend to run a quick mental checklist on entering any new space: where are the corners, where is my exit, and what sound did I just hear. That three-question routine takes a second and covers the majority of ambush scenarios. It also scales — the same checklist works whether you are facing a base creature or an escalation version, because it focuses on positioning rather than memorized patterns.
What to practice first
If you are new to the roster, start with the freeze tell and perpendicular dodging. Those two skills apply to nearly every creature in the game, and mastering them early makes every subsequent encounter easier to read. Everything else in this PETAPETA monster guide builds on that foundation.
Frequently Asked Questions
How many monsters are in PETAPETA?
The game uses a compact core roster of distinct creature families rather than a large bestiary, then expands it with Mini Peta variants and faster escalation versions of the same creatures. Community playthroughs report that the effective threat count grows through remixing rather than new models, so learning a few tells covers most encounters.
What is the most important tell to learn first?
The brief freeze before an attack. Nearly every creature pauses for a fraction of a second before committing, and that stillness is your entire reaction window. Players who train themselves to notice when a monster stops, rather than tracking its movement, survive noticeably longer across all stages.
Are Mini Peta variants harder than the base monsters?
Yes, mainly because of timing and visibility. Mini Peta variants are smaller, move faster, and often appear in pairs, which shortens your reaction window and splits your attention. The underlying behavior is the same as the base creature, so the adjustment is reacting on the first cue instead of confirming it.
Do the same monsters appear in later levels?
They do, but as escalation versions with tighter timing windows and shorter warning animations. The silhouettes stay recognizable while the speed increases, which is why habits built in early stages can become liabilities later. Shortening your decision time matters more than learning new moves.
What should I practice before a difficult stage?
Perpendicular dodging and audio awareness. Stepping sideways removes you from charge paths, and several wind-up cues are audible before they are visible. Together those two habits cover the majority of ambush scenarios, including paired variants and late-stage escalation encounters.
The roster in this game rewards patience over memorization: a handful of tells, learned properly, carry you through every stage and every variant. Start with the freeze, dodge sideways, keep your back off the walls, and the PETAPETA monster list stops feeling like a threat and starts feeling like a map.